
Audio-Enabled HDMI to DVI Bridge for Seamless Laptop-Desktop Setup
Seamlessly Pairing Your Wireless Keyboard - Instructions Included
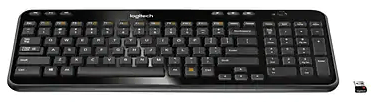 Don’t know how to connect your newly boughtwireless keyboardto your Windows PC? Don’t worry! It is very, very easy! In this article, we’ll give you step-by-step instructions to help you connect your wireless keyboard to your Windows PC.
Follow these steps
- Put the battery in your wireless keyboard
- Insert the unifying receiver into the USB port
- Turn on your wireless keyboard
- Wait until your wireless keyboard pairs with your PC
- Test your wireless keyboard
- Bonus tip: How to fix the wireless keyboard not working issue?
Step 1: Put the battery in your wireless keyboard
Put the battery in your wireless keyboard. Make sure you install it correctly. You can skip this step if there is a built-in battery in your wireless keyboard.
Step 2: Insert the unifying receiver into the USB port
Usually, the wireless keyboard comes witha unifying receiver. You need to insert the unifying receiver into the USB port on your PC.
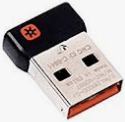
the unifying receiver
Step 3: Turn on your wireless keyboard
Turn on your wireless keyboard. the On / Off switch usually can be found on the back or the side of your keyboard.
Step 4: Wait until your wireless keyboard pairs with your PC
Once you turn on your wireless keyboard, it will start to pair with your PC. If you see any prompted dialog on your computer,just confirm and allow it to connect. It may take a while. Wait until your wireless keyboard pairs successfully with your PC.
Step 5: Test your wireless keyboard
You need to test your wireless keyboard when it is connected to your computer. You can openWordor any other word-processing application andtry pressing the keys on your wireless keyboardto see if your wireless keyboard works on your computer.
Bonus tip: How to fix the wireless keyboard not working issue?
If your wireless keyboard won’t type or it fails to connect to your computer, you can check the troubleshooting steps below:
1. Check the hardware issues
- Check if your wireless keyboard runs out of battery . You can put new batteries in your wireless keyboard to see if it can work or not.
- Unplug and re-plug the battery and receiver and try connecting your keyboard again.
If your wireless keyboard is still not working, you can try updating your drivers.
2. Update your wireless keyboard driver
If your wireless keyboard driver is missing or outdated, it may cause your wireless keyboard to stop working. So you can try updating its driver to see if your keyboard can work. There are two ways to update your wireless keyboard keyboard driver: manually or automatically.Update your wireless keyboard driver manually – You can update your wireless keyboard driver manually by going to the manufacturer’s website and searching for the latest driver for your wireless keyboard. Be sure to choose the driver that’s compatible with your exact wireless keyboard model and your version of Windows.
Or
Update your wireless keyboard driver automatically – If you don’t have the time, patience or computer skills to update your wireless keyboard driver manually, you can, instead, do it automatically with Driver Easy . You don’t need to know exactly what system your computer is running, you don’t need to risk downloading and installing the wrong driver, and you don’t need to worry about making a mistake when installing. Driver Easy handles it all.
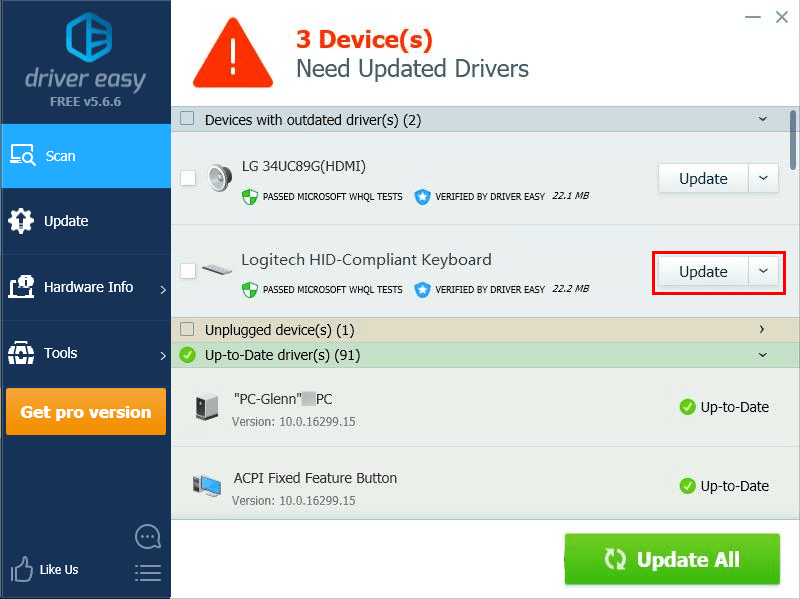
- Download and install Driver Easy.
- Run Driver Easy and click Scan Now . Driver Easy will then scan your computer and detect any problem drivers.

- Click Update next to your wireless keyboard to automatically download the correct version of its driver, then you can install it manually. Or click Update All to automatically download and install the correct version of all the drivers that are missing or out of date on your system (This requires the Pro version – you’ll be prompted to upgrade when you click Update All. You get full support and a 30-day money back guarantee ).

If you need assistance, please contactDriver Easy’s support team at [email protected] .
If you have any questions or suggestions, please leave your comments below.
Also read:
- Achieve Calmness: GPT-Powered Stress Relief
- All About College Men's Basketball: Catch Every Game Live, From the Excitement of March Madness to The Final Four Radio Updates
- All You Need to Know About the Upcoming iPhone 17 - Price Guess, Specs & When It Hits Shelves
- Decoding and Overcoming Stop Code 0X0000003D: A Step-by-Step Fixing Strategy for Windows Users
- Discover a Stable and Uninterrupted Playthrough of Disco Elysium on Your PC - Errors Fixed!
- How to Use Virtual Reality Tours
- In 2024, Uploading YouTube Vids Seamlessly on Instagram
- Inside Look at the Samsung Galaxy Ring: Costs, Debut Dates, Specifications & Updates
- Is It Time to Switch to an RTX GPU? - Making the Right Choice
- Navigating the Digital Classroom: A Guide to 9 Key Tech Tools for Academic Success
- Order Matters! How to Experience the Complete Storyline of Superman Movies
- Propel Your Instagram Content Techniques for Higher Interaction for 2024
- Solving Windows 10 Boot Volume Damage: A Step-by-Step Guide
- Tesla Robotaxi Unveiled! Discover Latest News, Prospective Pricing & Revelations Awaiting
- The End of Windows Control Panel?: Microsoft Announces Major Shift - Are We Witnessing the Future Yet? | GadgetGuru
- Top 10 Best Free WebM Video Editors
- Troubleshooting Guide: How to Resolve Issues with Spotify on Android Auto
- Utilizing ChatGPT for Custom Trainer Approaches
- Watch Movies with Fandango on Apple TV - A Step-by-Step Tutorial
- Title: Audio-Enabled HDMI to DVI Bridge for Seamless Laptop-Desktop Setup
- Author: Andrew
- Created at : 2025-01-16 23:31:14
- Updated at : 2025-01-23 02:06:31
- Link: https://tech-renaissance.techidaily.com/audio-enabled-hdmi-to-dvi-bridge-for-seamless-laptop-desktop-setup/
- License: This work is licensed under CC BY-NC-SA 4.0.