
Easy Tutorial for Setting Up a Second Monitor with Your Notebook
Easy How-To Tutorial for Windows 11 Setup via External USB Stick - Including Images
Note : Before we begin, we need to make sure that you are fully equipped. First, you need to have an Internet connection and sufficient data storage available on a computer, USB or external drive for the download. You also need to have ablank USB with at least 4 GB or 8 GB (if you want both 32-bit and 64-bit) if you want to create media. The content in the USB that is used to store to creation media will be erased.
Also, please check theSystem Requirements on the official website of Microsoft to make sure that your PC is qualified to upgrade to Windows 10. Please also make sure that you have your Microsoft product key (in the form of xxxxx-xxxxx-xxxxx-xxxxx-xxxxx ) at hand, just in case of it is required.
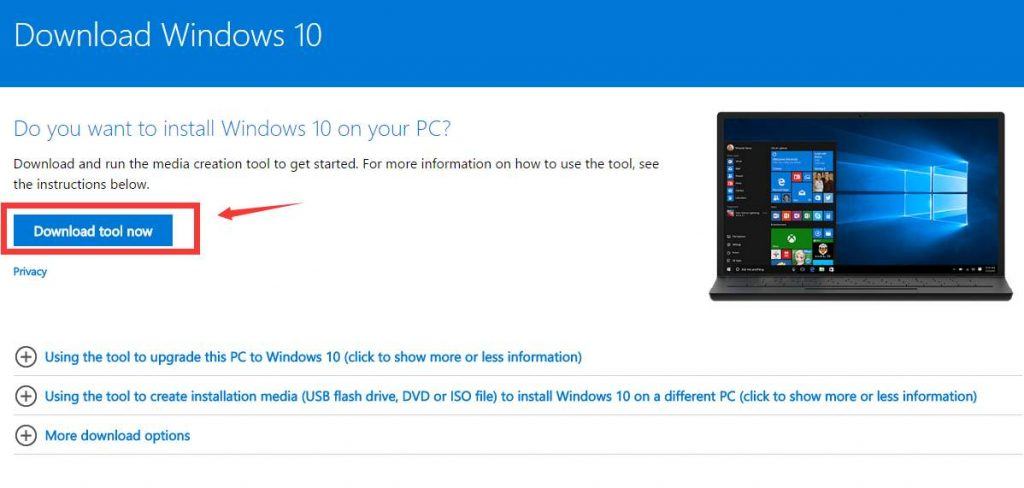
- Go to the Get Windows 10 downloadwebsite , then download the Download Tool by clicking pressing the blue button.
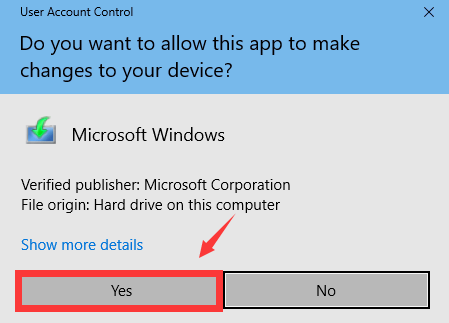
- Double click theMediaCreationTool.exe file to run the installation of it. If prompted by UAC, just clickYes .
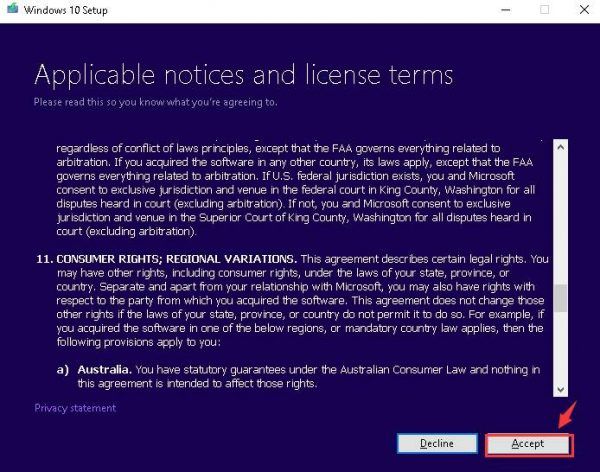
- ClickAccept.
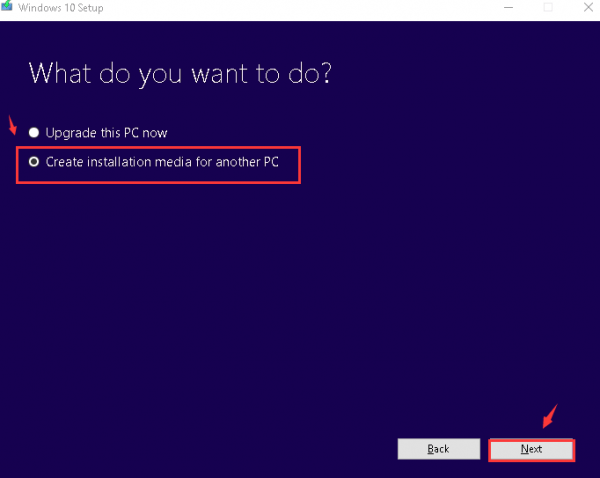
- ChooseCreate installation media for another PC. Then chooseNextto continue.
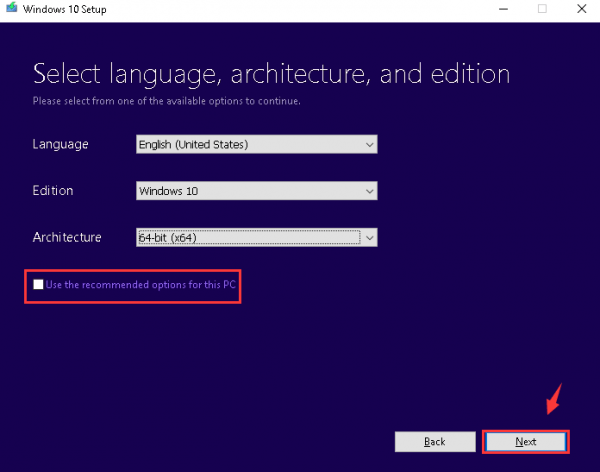
- If you leave the boxUse the recommended options for this PCchecked, your language, edition and architecture settings will remain the same as your current PC. So, uncheck the option, then fill in your own preference settings. Then pressNextto continue.
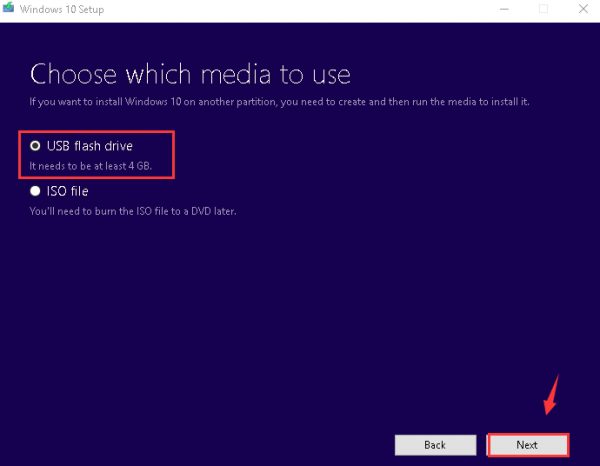
- ChooseUSB flash drive, and then clickNext.
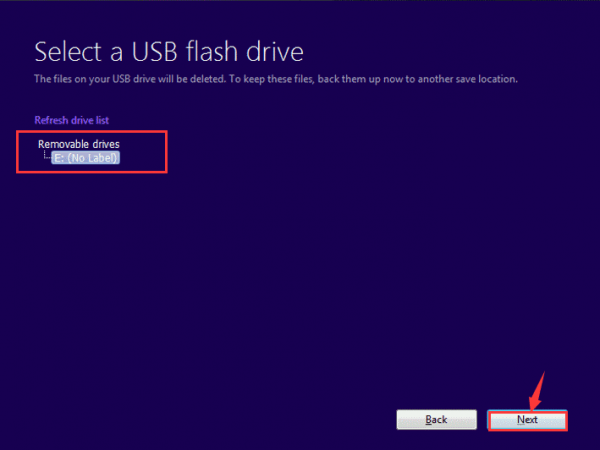
- Now plug in your USB flash drive, then choose the flash drive you have and clickNext.
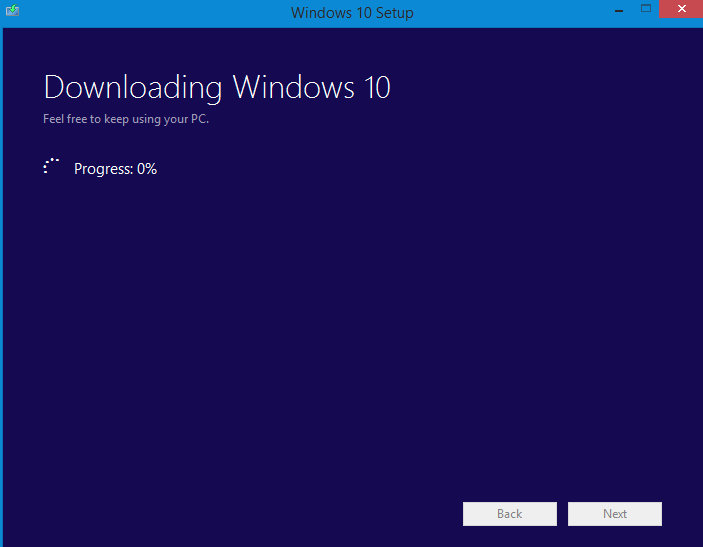
- Windows 10 will now begin to download. The speed of which will be determined by the Internet speed that you have.
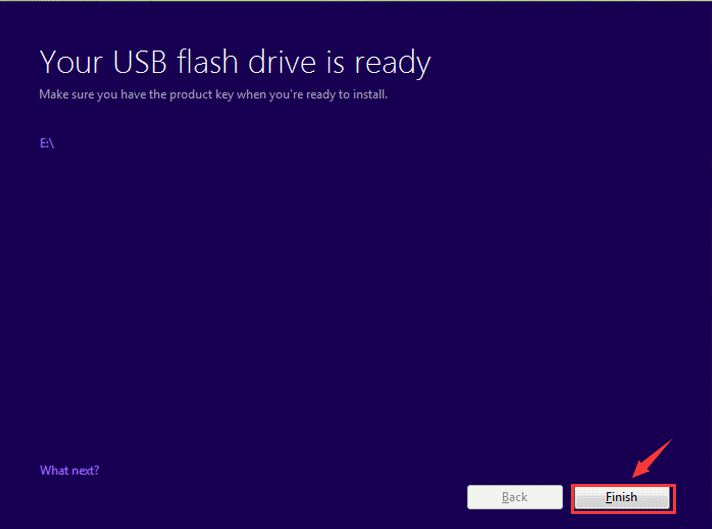
- When the download is finished, you will be seeing this window. Just clickFinishto continue.
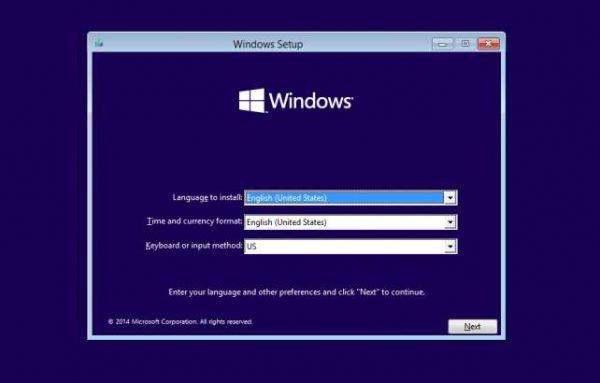
Plug the USB out from your current computer, and then plug it into the computer that you would like to install Windows 10 on. Then restart your computer. You might need to press some key or combination of keys to go to boot menu. The keys to press, such as F12, F2, Delete, or Esc, differ on computers from different manufacturers, so it is suggested that you go to the support website of your computer to find out what keys to press to enter the boot menu for your computer first.
On the Windows Setup page, select your language, time and keyboard preferences. Then selectNext.
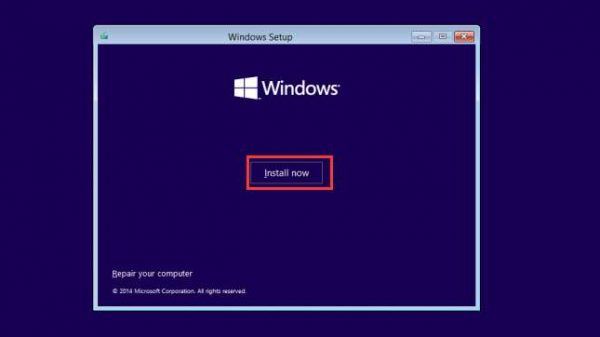
- SelectInstall now.
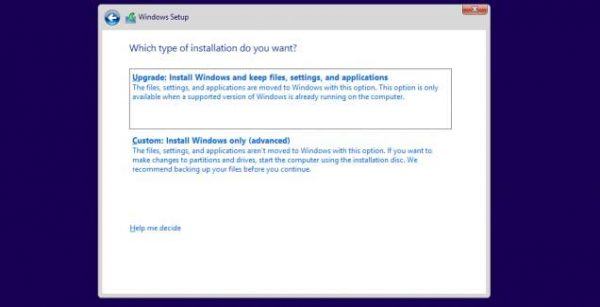
- If you are not a tech savvy, it is suggested that you choose the first option here.
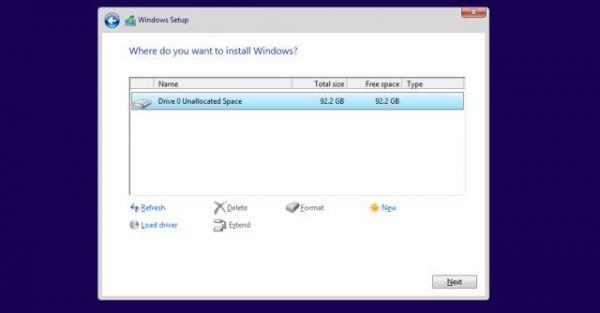
- You can choose to install your Windows 10 system file to a certain partition here.
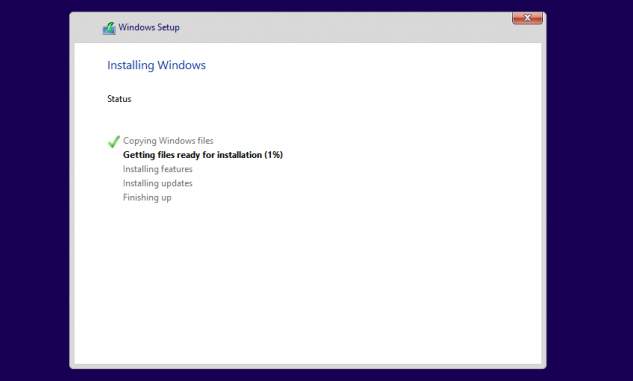
- Windows 10 is now installing.
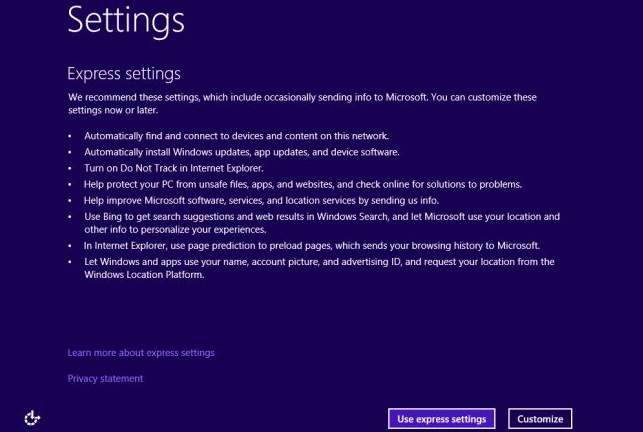
- You are required to perform a restart of your computer now. When your PC starts back on, you need to select the settings. It is suggested that you chooseCustomizeif you don’t want to change the settings later manually.
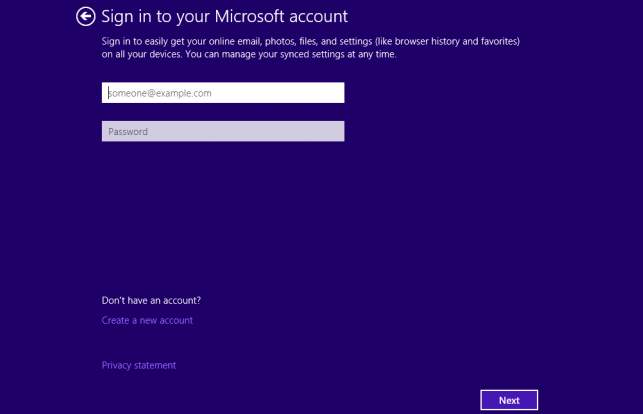
- Sign in with your account now. Then hitNextto continue.
- The rest of the procedures are quite simple, and you should have no problem follw through with the detailed instructions from Microsoft.
Also read:
- [New] 2024 Approved How to Blur Faces in Piscart in Simple Ways
- [New] 2024 Approved The 15 Smartest Ways to Watch NBA Live in Action
- [Updated] Easy Steps for Tempo Control in Instagram Videos
- Compare Apple Watch Ultra Vs. Series 8 - Find Your Perfect Fit!
- How to Get and Use AMD's Newest Video Card Drivers - Version 24.10 Release
- How to Watch Apple's Latest Spatial Videos in Stunning 3D Using the Meta Quest Device - A Comprehensive Tutorial | Tech Insights
- In 2024, Top 6 HDMI 2.1 Monitor
- July 2024 Ultimate Guide to Premium Apple Bargains: Spotlighting IPhones, Watches, and Tablets on ZDNET
- Navigating the Future of Intelligence: How Apple Must Evolve Its AI Features to Challenge Tech Giants OpenAI and Google – Expert Analysis by ZDNet
- Reactivating Outlook: Overcoming One-Way Startup Glitches
- The Artisan's Guide to Personal Branding via YouTube
- Troubleshooting Steam: Solutions for a Sluggish Connection
- Unlock Apple iPhone 11 Pro With Forgotten Passcode Different Methods You Can Try
- Title: Easy Tutorial for Setting Up a Second Monitor with Your Notebook
- Author: Andrew
- Created at : 2025-01-29 16:18:24
- Updated at : 2025-01-30 16:26:42
- Link: https://tech-renaissance.techidaily.com/easy-tutorial-for-setting-up-a-second-monitor-with-your-notebook/
- License: This work is licensed under CC BY-NC-SA 4.0.