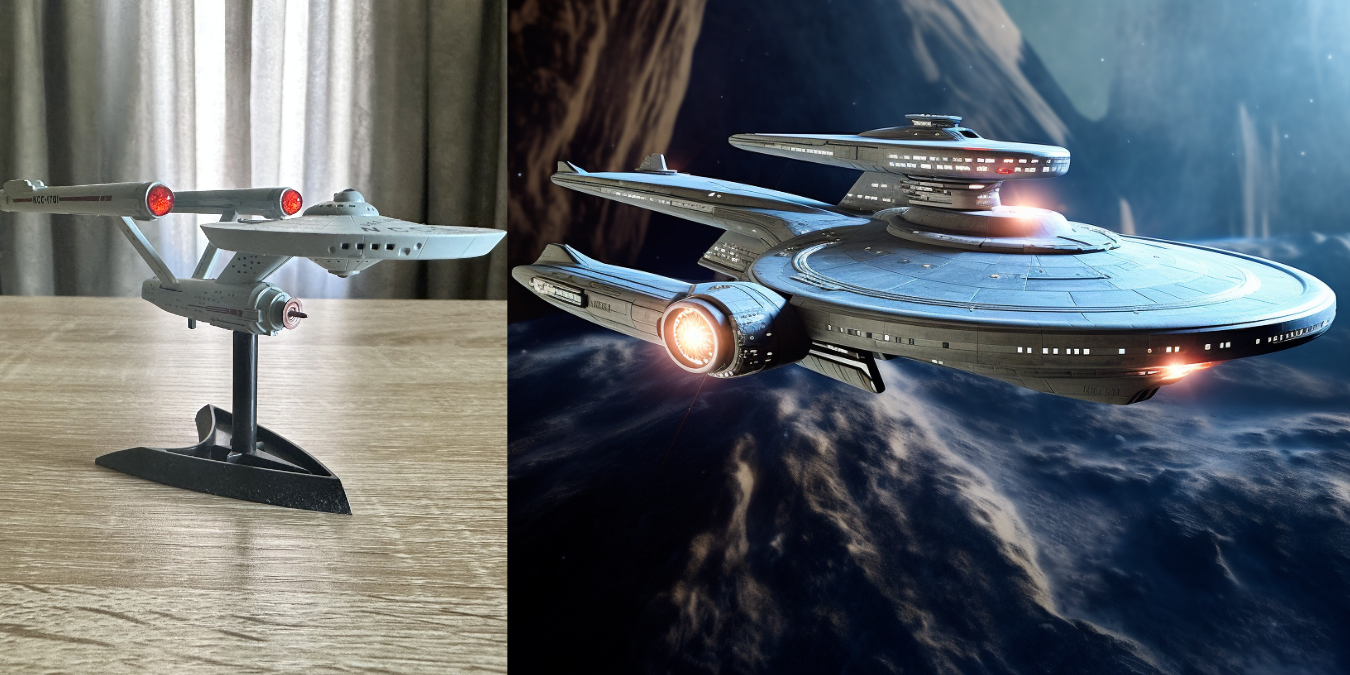
Guide to Integrating Self-Taken Pictures Into the MidJourney Experience

Guide to Integrating Self-Taken Pictures Into the MidJourney Experience
Key Takeaways
- Upload your image to the Discord server.
- Copy the link to the image you’ve uploaded.
- Write a normal MidJourney prompt but insert your image link after the “/imagine” command.
- To further influence the style and composition of the generated art, set the image weight and aspect ratio parameters.
We’ve marveled as MidJourney just keeps improving, but it’s still hard to have precise control of what you get after your prompt is submitted. By starting off with an existing image, you can steer what sort of art you get.
In this guide, I assume you already know the basics of how to use MidJourney. If you don’t, it’s a good idea to read our MidJourney primer first.
Sending Your Image to The MidJourney Discord Bot
Assuming that you have an existing image that’s close to what you want (e.g. a person in the right pose) you first need to send that image to the MidJourney Discord Bot.
Don’t submit any sensitive or private images into the Discord chat with the MidJourney Discord bot. If you’re using the cheapest tier of the MidJourney service which does not have “stealth” mode, your output images are public, and there’s no guarantee that your source image won’t ever end up where it shouldn’t. Only ever send images in any chat app that you’re 100% comfortable showing to anyone.
Using the Discord desktop app , simply upload your image using the “+” upload button, or drag and drop the image into the chat.
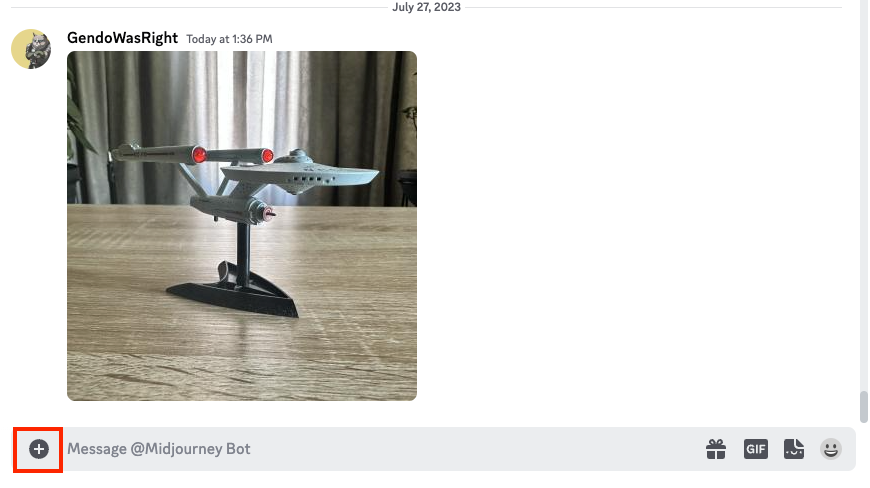
Adding an image to the Discord Chat
Getting the Image Link
Now that you’ve uploaded your image to the Discord servers and its visible in your chat, we need to extract the link pointing directly at the image file. To do this, right-click on the image and select “Copy link”. (If you’re on the mobile app, tap and hold the image, then select “Copy media link.”) Be careful not to click “Copy image” since this copies the image itself to the clipboard rather than the hyperlink.
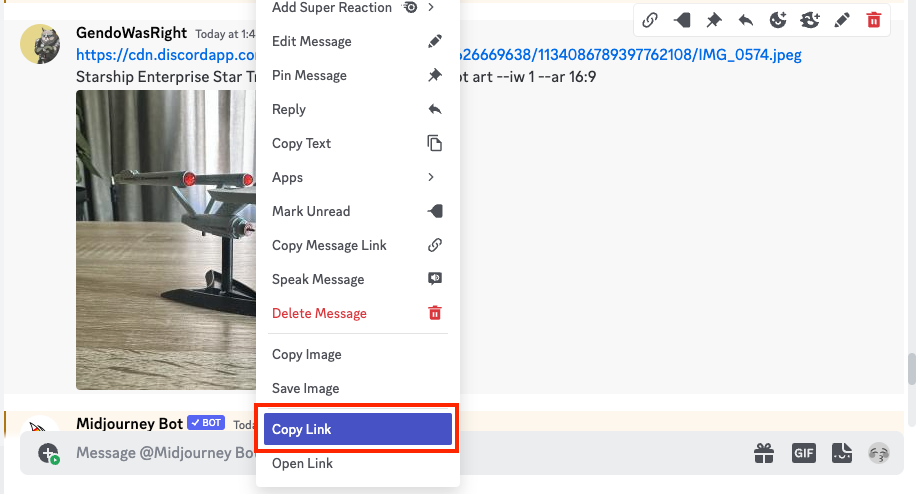
Copying a Discord image link
If you paste the contents of the clipboard into your chat box or any other text field, you’ll see this long string ending in an image extension, in this case .JPG .
Constructing Your Prompt
Start your prompt the usual way by typing “/imagine” and then pressing the spacebar.
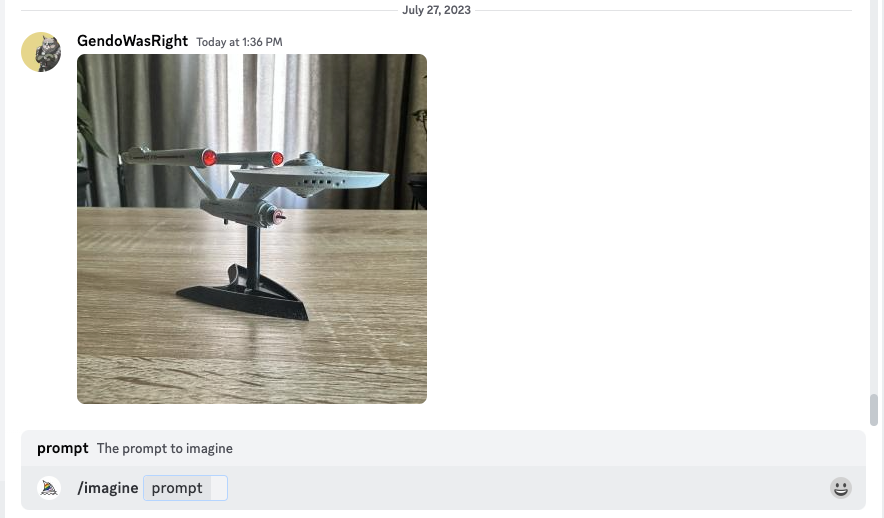
Starting a MidJourney Prompt
Now, paste the image link as the very first part of the prompt.
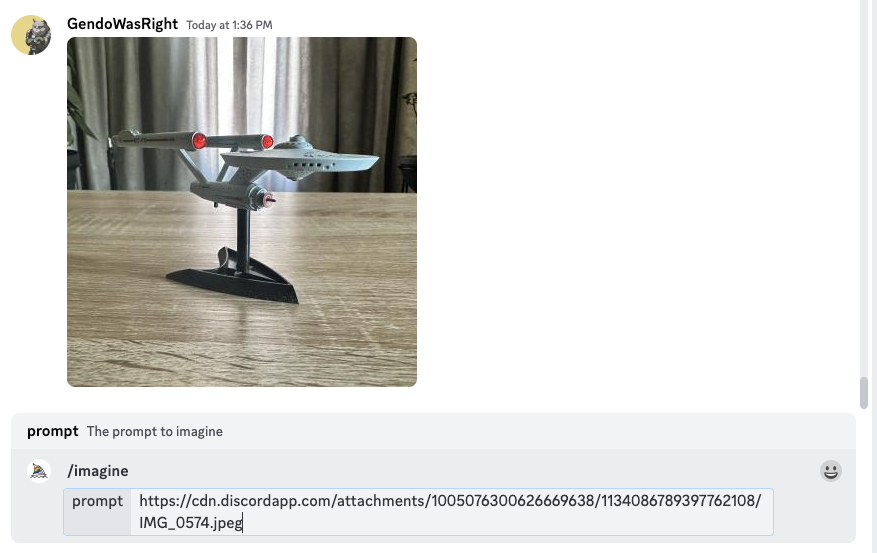
Pasting image link into MidJourney prompt
Now you can write the actual prompt. While you can write anything you like, the idea here is to write something that makes sense based on the image you uploaded. MidJourney will start with your image as the initial point rather than random noise, so in most cases you should get something that resembled the composition of your image.
In this case, I snapped a photo of one of my Star Trek models, and so for this prompt we’ll go with “Starship Enterprise Star Trek flying in space epic concept art”.
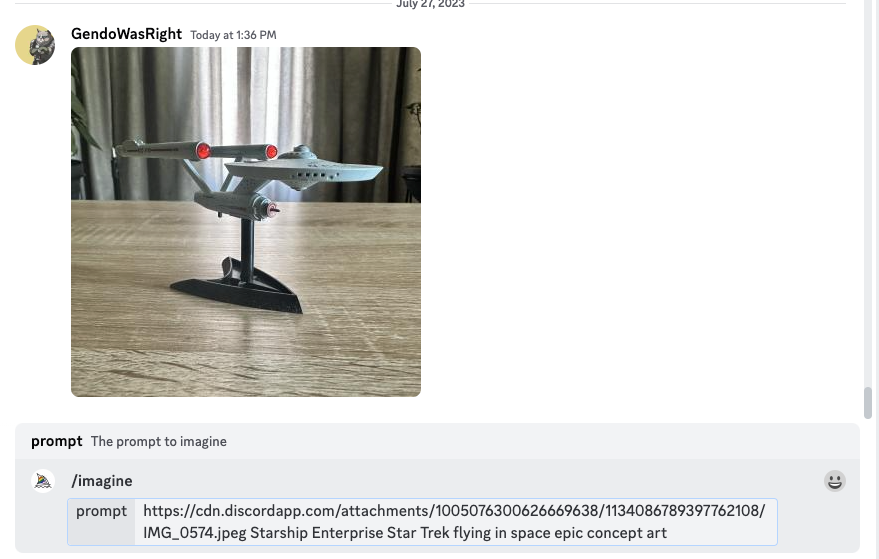
Adding Prompt to image link in MidJourney
Don’t submit the prompt yet, because we have to include two more important parameters.
Setting the Image Weight and Aspect Ratio
The image weight parameter tells MidJourney how closely it should stick to the original picture. The image weight parameter for MidJourney V5 (5.2 is the latest as of this writing) can range from 0-2. With an image weight of 2, the result will be strongly inspired by the image prompt, but something like 0.5 will only loosely inspire it.
Here we’re going to add the parameter “–iw 2” at the end of our prompt.
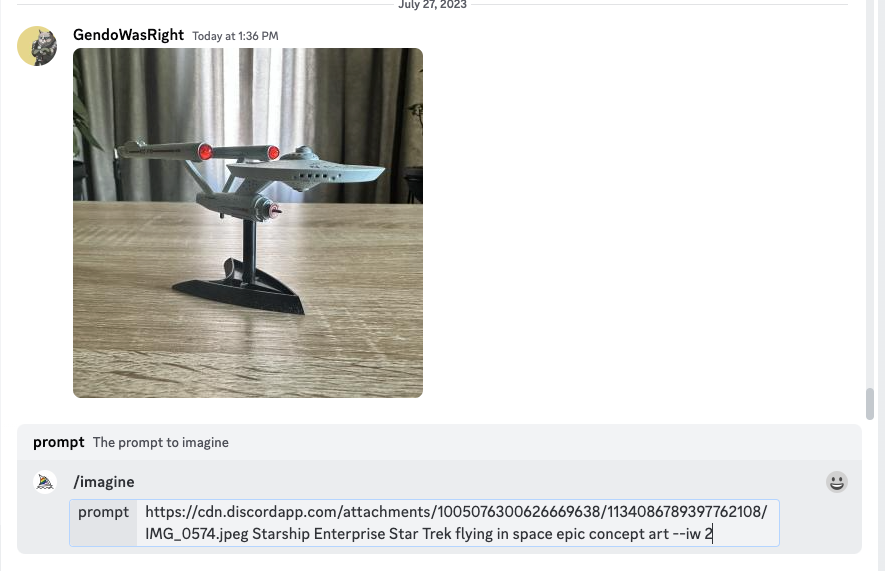
Adding Image Weights to MidJourney
Next, we’ll specify the aspect ratio. MidJourney makes square images by default, but that’s not always what you need. Our image prompt is square as well, but we’re going to widen it to 16:9, which is the most common widescreen aspect ratio . To do this, we add “–ar 16:9” to the end of the prompt.
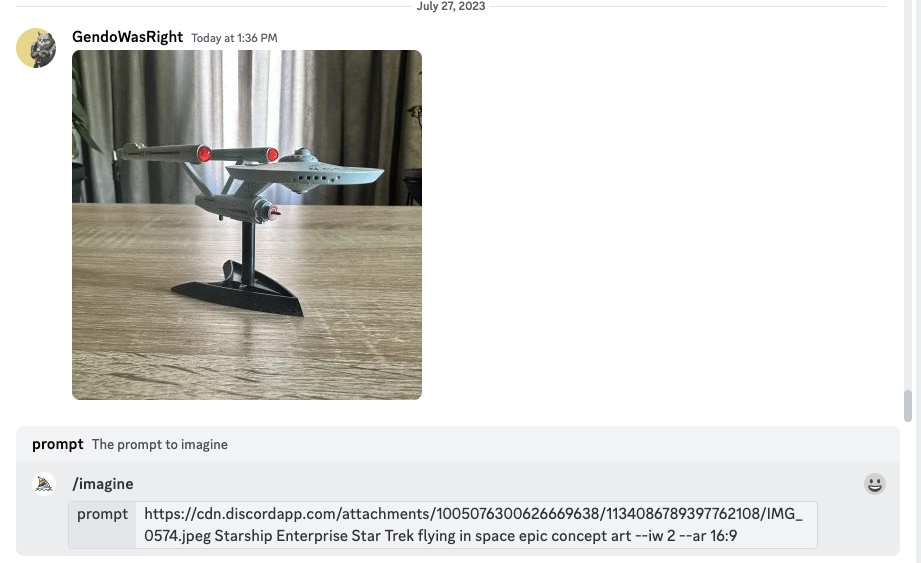
MidJourney aspect ratio paramter
Now, finally, we’re ready to submit.

MidJourney / How-To Geek / Sydney Butler
This hasn’t turned out very well at all! This is because the image weight setting is too high. So let’s run the same prompt again, but this time at 1.5.

MidJourney / How-To Geek / Sydney Butler
Much better! Let’s try again at 0.5.

MidJourney / How-To Geek / Sydney Butler
And now we have a pretty cool result!
Using image prompts isn’t an exact science, and it’s not like other generative AI techniques such as inpainting, but it does give you significantly more control over where MidJourney starts its process, making more creative choices possible.
If you want to do more with Midjourney, check out our guide to Midjourney models , or how to make awesome wallpapers with MidJourney .
Also read:
- [New] In 2024, Techniques for Discarding Backlogged YouTube Videos
- [New] Pro Tip! 8 Key Sites to Harvest FREE Eco-Friendly Filming Backdrops
- [New] Understanding Your Earning Potential - YouTube's Latest Rules for 2024
- A Detailed Guidance How To Add Custom Ringtones And Sounds To Your Android for 2024
- Apple iPhone 6s Backup Password Never Set But Still Asking? Heres the Fix
- Free Movie Goldmine: Your Guide to the Best Film Selections on YouTube in July 2024
- How to Disable or Reset Your Login PIN in Windows 11 Easily
- In 2024, Fast, Easy, FREE Uncovering the Best 10 Image Converters
- In 2024, Optimize Your Viewing Experience on YouTube with Speed Settings
- Leading Lists Compelling Google Cardboard VR Game Selections for 2024
- Navigating Headlines: The Elite List of News Aggregators
- Overcoming Issues with the Spell Check Feature in Your Outlook Email Client
- Simplified Steps: Comprehensive Method for Picking Out Selected Messages on Gmail
- Spotlight on Innovation: Meet the Latest in Apple's iPhone Lineup
- Step-by-Step Solutions for d3dx9_26.dll Error Recovery
- Unveiling the Technical Marvels of DJI Inspire 2 for 2024
- Title: Guide to Integrating Self-Taken Pictures Into the MidJourney Experience
- Author: Andrew
- Created at : 2024-12-15 12:56:08
- Updated at : 2024-12-16 16:43:12
- Link: https://tech-renaissance.techidaily.com/guide-to-integrating-self-taken-pictures-into-the-midjourney-experience/
- License: This work is licensed under CC BY-NC-SA 4.0.